

People Overview
The People page provides a centralized directory of your team members. Track employee information, manage departments and divisions, view employment details, and maintain location data for your entire organization.
Accessing the People Page
Navigate to Finance in the left sidebar, then select People from the submenu. The page displays all team members with their basic information and employment status.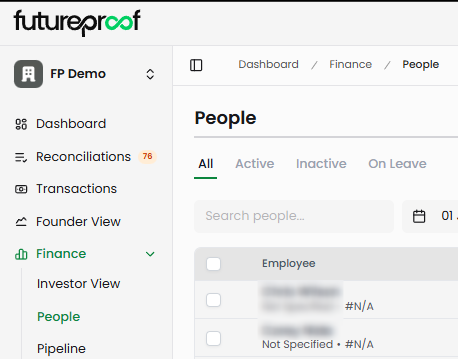
Page Layout
Status Tabs
The page includes four tabs that filter employees by status: All, Active, Inactive, and On Leave. The All tab shows every team member regardless of status. Active displays currently employed team members. Inactive shows former employees or those no longer with the company. On Leave displays employees temporarily away from work.
Employee status can be changed at any time by editing their record. Moving someone from Active to On Leave, or from Active to Inactive, updates their status across the system.
Why it matters: Status filtering helps you quickly focus on current team members for headcount reports, distinguish active employees from those on temporary leave, or maintain historical records of past team members.
Search and Filters
The search box filters the employee list by name. Type any part of an employee's name to instantly narrow the list. For more comprehensive filtering, use the filter menu to combine multiple criteria.
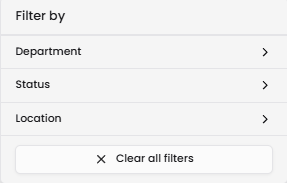
Click the filter icon to access advanced filtering options. Available filters include Department (filter by specific departments like Engineering, Sales, or Marketing), Status (Active, Inactive, or On Leave), and Location (office locations or remote work designations). Filters can be combined to create precise views—for example, showing only Active employees in the Engineering department located in San Francisco.
Why it matters: Effective filtering helps you analyze team composition, generate department-specific reports, track headcount by location, or prepare organizational charts without scrolling through your entire employee list.
Employee Table Columns
Employee
Displays the employee's full name with additional context below. The second line shows location status and employee ID. "Not Specified" appears when no location has been assigned, while "#N/A" indicates no employee ID has been entered.
Shows the employee's email address. This field requires a valid email format and serves as a primary contact method.
Department
Displays the assigned department for each employee. Departments are more specific organizational units like Engineering, Sales, Marketing, Operations, Customer Success, Product, Finance, or HR. Employees can be assigned to only one department. "Not Assigned" appears when no department has been set.
Why it matters: Department assignments enable granular expense analysis when combined with transaction tagging in Reconciliations. Track which departments drive costs, allocate expenses to specific teams, or build departmental budgets.
Division
Shows the broader organizational division. Divisions represent higher-level groupings that contain multiple departments—for example, a Technology division might include Engineering and Product departments. This column displays "—" when no division is assigned.
Why it matters: Division tracking helps larger organizations maintain hierarchical reporting structures and analyze costs at both the division and department level.
Status
Indicates the employee's current employment status. Status appears as colored badges: Active (green) for currently employed team members, Inactive for former employees, On Leave for temporarily absent employees, and Unknown (gray) for records without a defined status.
Status values correspond to the filtering tabs at the top of the page. Changing an employee's status updates which tab displays their record.
Location
Shows where the employee works, whether that's a physical office location or remote work designation. This is freeform text and doesn't affect calculations or reports. "Not Specified" appears when no location has been entered.
Hired
Displays the employee's start date with the company. This corresponds to the Start Date field on the Employment tab when adding or editing team members. "Not Available" appears when no hire date has been entered.
Toolbar Actions
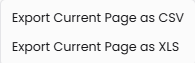
Export
Click the export icon to download your employee data. Choose Export Current Page as CSV for comma-separated values format, or Export Current Page as XLS for Excel format. The export includes all visible columns (Name, Email, Department, Division, Status, Location, Hire Date) and respects your active filters and search criteria.
Why it matters: Exporting enables deeper analysis in spreadsheet tools, supports integration with HR systems, provides backup copies of employee data, or creates headcount reports for investors and board members.
Column Customization
Click the column customization icon to control which columns appear in your employee table. Check or uncheck Name, Email, Department, Division, Status, Location, and Hire Date to show or hide those columns. Click "Reset Column Order" to return to the default layout.
Column customization persists per user, so your preferences remain when you return to the People page.
Why it matters: Customizing your view helps you focus on the information most relevant to your current task, whether that's reviewing departments, checking locations, or verifying hire dates.

Table Settings
The table settings menu provides options for managing your view and selections. Reset Column Sizes restores default column widths if you've manually resized them. Reset Column Order returns columns to their default sequence. Clear Selection deselects any rows you've checked using the checkboxes on the left side of the table.
Bulk Operations
Select multiple employees using the checkboxes in the leftmost column. With employees selected, you can perform bulk export operations to download data for just the selected team members.
The selection counter at the bottom left shows "0 selected" and updates as you check rows. Use "Clear Selection" in the Table Settings menu to deselect all rows at once.
Why it matters: Bulk selection enables targeted exports for specific teams, departments, or groups of employees without exporting your entire employee directory.
Adding New Team Members
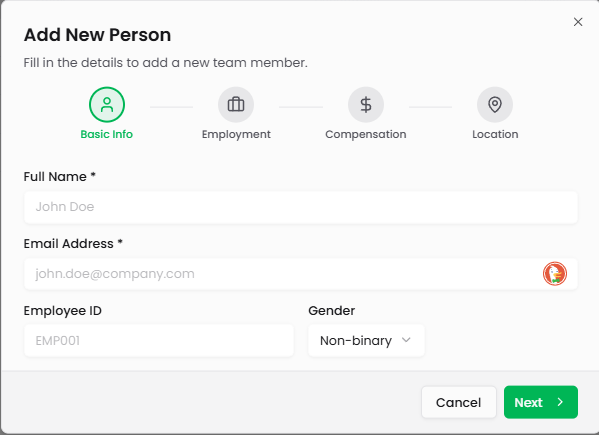
Click the green "+" button in the top right to open the Add New Person modal. The modal includes four tabs that organize employee information: Basic Info, Employment, Compensation, and Location.
You can navigate between tabs as you fill out information. Some fields like name and email are mandatory, while others can be skipped and completed later. Progress through the tabs using the "Next" button, or jump directly to specific tabs by clicking their headers.
Basic Info Tab
The Basic Info tab captures essential employee details.
Full Name (required): Enter the employee's complete name. This appears in the Employee column of the main table.
Email Address (required): Enter a valid email address. This serves as the primary contact method and must follow standard email format.
Employee ID: Enter a unique identifier for the employee. This is optional and appears as "#N/A" in the employee list if not provided. Employee IDs can be auto-generated by your HR system or manually assigned.
Gender: Select from the dropdown: Male, Female, Non-binary, or Prefer not to say. This field is optional.
Why it matters: Basic information establishes the employee's identity in your system and provides essential contact details for communication and record-keeping.
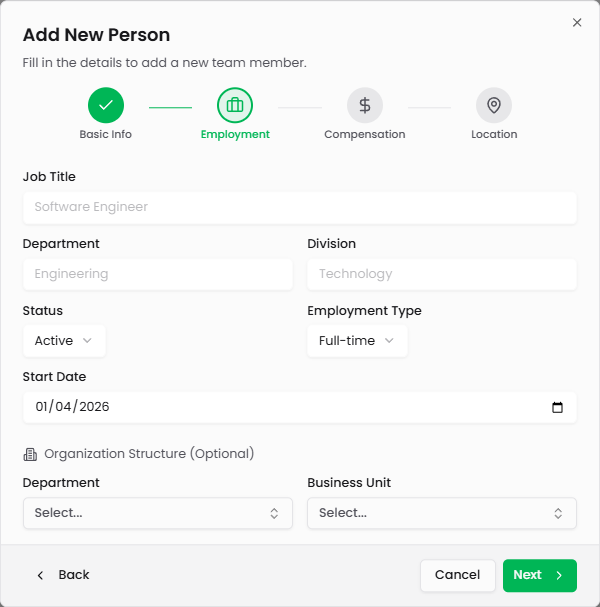
Employment Tab
The Employment tab tracks job details and organizational placement.
Job Title: Enter the employee's position or role (e.g., Software Engineer, Sales Manager, Product Designer).
Department: Assign the employee to a department. This is typed in and should match existing department names for consistency.
Division: Assign the employee to a broader division if your organization uses this structure. Division represents a higher-level grouping than department.
Status: Select the employment status from the dropdown: Active, Inactive, or On Leave. This determines which status tab displays the employee.
Employment Type: Select from the dropdown: Full-time, Part-time, Contract, or Intern. This indicates the nature of the employment relationship.
Start Date: Enter the employee's hire date using the date picker. This populates the Hired column in the main table.
Organization Structure (Optional): Additional fields for Department and Business Unit provide another layer of organizational hierarchy if needed.
Why it matters: Employment information enables accurate headcount reporting, supports departmental analysis, and maintains historical records of when team members joined the company.
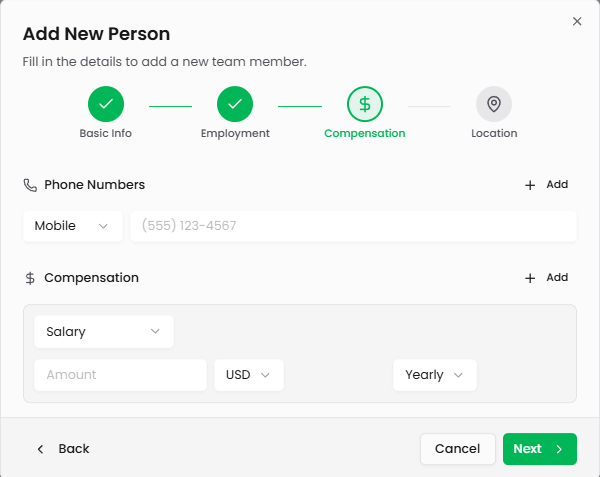
Compensation Tab
The Compensation tab manages contact information and pay details.
Phone Numbers: Add one or more phone numbers for the employee. Click "Add" to include additional numbers. For each number, select the type from the dropdown (Mobile, Work, or Home) and enter the phone number.
Compensation: Add one or more compensation entries. Click "Add" to include additional compensation items. For each entry, configure:
Type: Select from the dropdown (Salary, Hourly, or other compensation types)
Amount: Enter the compensation value
Currency: Select the currency (USD by default)
Frequency: Select how often this compensation is paid (Yearly, Monthly, or other frequencies)
Multiple compensation entries allow you to track base salary, bonuses, commissions, or other compensation components separately.
Why it matters: Compensation tracking supports payroll reconciliation, budget planning, and financial forecasting. Phone numbers provide additional contact methods beyond email.
Location Tab
The Location tab captures where the employee works. This corresponds to the Office Location field shown in the employee detail view. Enter office location, city, remote work designation, or other location information as freeform text.
Why it matters: Location data helps track geographic distribution of your team, supports remote work management, and provides context for time zones and regional considerations.
When you've completed all necessary information, click "Save Changes" to add the employee to your directory. Click "Close" to cancel without saving.
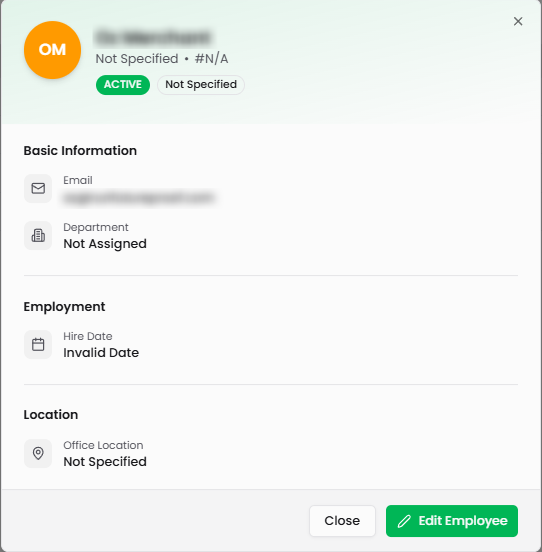
Viewing and Editing Employee Details
Click any employee row to open their detail modal. The modal displays comprehensive information organized into sections: Basic Information, Employment, and Location.
Basic Information shows Email and Department assignment. Employment displays the Hire Date (or "Invalid Date" if not set). Location shows the Office Location (or "Not Specified" if not set).
Click the green "Edit Employee" button to modify any employee information. This reopens the multi-tab editing interface where you can update fields across all tabs. Click "Close" to exit the detail view without making changes.
Why it matters: The detail view provides quick access to essential employee information without navigating through multiple screens. Edit capability ensures records stay current as employment details change.
Understanding Employee Statuses
Employee records can have one of four statuses that determine where they appear in the filtered views:
Active indicates currently employed team members who are working normally. Most employees fall into this category during their tenure with your company.
Inactive designates former employees or those no longer with the company. Use this status when someone leaves the organization to maintain historical records without displaying them in active headcount.
On Leave marks employees temporarily away from work, such as medical leave, parental leave, or sabbatical. This distinguishes temporary absences from permanent departures.
Unknown appears for records without a defined status. This is a placeholder that should be updated to one of the three primary statuses.
Status can be changed at any time by editing the employee record. Moving someone from Active to On Leave reflects temporary absence, while changing from Active to Inactive records a departure.
Why it matters: Accurate status tracking ensures headcount reports reflect your actual team size, distinguishes temporary absences from permanent changes, and maintains clean historical records of past team members.
Tips for Managing Your Team Directory
Maintain consistent department names: When entering departments, use standardized names (Engineering, Sales, Marketing, etc.) to ensure accurate filtering and reporting. Inconsistent naming (Eng vs Engineering vs Software) creates fragmented data.
Set employment types accurately: Distinguish between Full-time, Part-time, Contract, and Intern status to support workforce analysis and contractor vs employee tracking for compliance purposes.
Update statuses promptly: When someone goes on leave or departs, update their status immediately. This keeps headcount reports accurate and prevents confusion about current team size.
Use divisions for larger organizations: If you have multiple departments that roll up to broader groups, leverage the Division field to create hierarchical reporting structures.
Complete hire dates: Enter start dates for accurate tenure tracking and to support anniversary recognition, vesting calculations, or other time-based analyses.
Add compensation details: While optional, tracking compensation supports budget planning, enables payroll reconciliation, and provides data for financial forecasting.
Export regularly: Create periodic exports for backup purposes or to share headcount data with leadership, investors, or other stakeholders who don't have direct access to Futureproof.
Leverage bulk exports: When creating reports for specific teams, use filters to narrow to the relevant group, then export just those employees rather than your entire directory.
Keep contact information current: Maintain accurate email addresses and phone numbers to ensure you can reach team members when needed.