

Invoices
The Invoices page tracks all customer invoicing activity for your business. Create manual invoices, view automatically imported Stripe invoices, monitor payment status, and manage accounts receivable. This centralized invoice management helps you track outstanding balances, identify overdue payments, and maintain clear records of customer billing.
Accessing the Invoices Page
Navigate to Revenue in the left sidebar, then select Invoices from the submenu. The page displays all invoices from both manual creation and Stripe integration.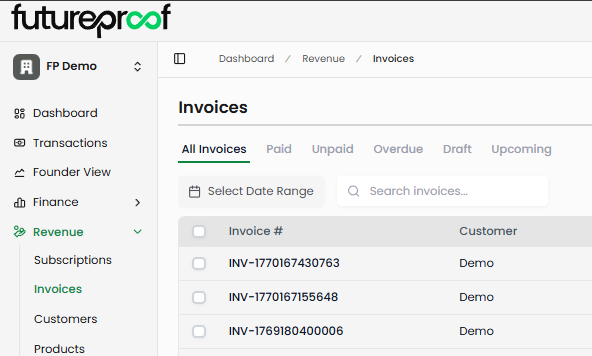
Page Layout
Summary Metrics
The header displays key invoice metrics at a glance. Total Invoices shows your complete invoice count for the selected date range. Outstanding displays the count of unpaid invoices requiring collection. Outstanding Balance shows the total dollar amount owed across all unpaid invoices. Overdue indicates how many invoices have passed their due date without payment. Due This Week counts invoices with due dates in the next seven days.
Why it matters: These metrics provide instant visibility into your accounts receivable health. High overdue counts signal collection issues requiring attention, while the outstanding balance helps forecast incoming cash flow.
Status Tabs
Six tabs filter invoices by status: All Invoices shows every invoice regardless of status. Paid displays invoices that have been fully paid. Unpaid shows invoices awaiting payment. Overdue filters to unpaid invoices past their due date. Draft displays invoices saved but not yet finalized. Upcoming shows invoices with future issue dates.
Status filtering helps you focus on specific invoice groups. Review the Unpaid tab during collections efforts, check Overdue for immediate follow-up needs, or examine Draft invoices before finalizing them.
Why it matters: Different invoice statuses require different actions. Overdue invoices need collection follow-up, unpaid invoices need monitoring, and draft invoices need completion before sending to customers.
Invoice Table Columns
Invoice #
Displays the unique invoice identifier. Manually created invoices use custom alphanumeric codes you assign. Stripe-imported invoices use the format "INV-[timestamp]" with a sequential suffix. Click any invoice number to open the detail modal with complete invoice information.
Customer
Shows the customer name associated with the invoice. For manually created invoices, this displays the name from your Customers list. For Stripe invoices, this may show a customer ID if no name is set in Stripe.
Amount
Displays the total invoice value. This represents the full invoice amount, not the remaining balance. All amounts appear in green regardless of payment status.
Status
Indicates the current invoice state with color-coded badges. Paid (green) means the invoice has been fully paid. Unpaid (blue) indicates the invoice awaits payment. Draft (tan) shows the invoice is saved but not finalized. Authorized (purple) appears on some Stripe invoices indicating payment authorization status. Overdue (red) flags unpaid invoices past their due date.
For manually created invoices, you control status by editing the invoice. For Stripe invoices, status updates automatically based on payment activity in Stripe.
Why it matters: Status determines which invoices need action. Overdue invoices require immediate collection follow-up, while draft invoices need finalization before customers can pay them.
Invoice Date
Shows when the invoice was issued. This is the official invoice date that appears on the invoice document and determines when payment terms begin.
Due Date
Displays when payment is expected. Invoices become overdue automatically when the due date passes without payment. The system uses due dates to calculate overdue counts and identify collection priorities.
Balance
Shows the remaining amount owed. Paid invoices display $0, while unpaid invoices show the full invoice amount. For partially paid invoices, this reflects the outstanding balance.
Searching and Filtering Invoices
Date Range Selection
Click the date picker at the top of the page to control which invoices appear. Choose from preset options: Current Month, Last 2 Weeks, Last Month, Last 3 Months, Last 6 Months, Year-to-Date, or All Time. You can also select custom date ranges by clicking specific dates on the calendar.
Why it matters: Date filtering helps you focus on relevant time periods for month-end close, quarterly reviews, customer payment analysis, or preparing aging reports.
Search Box
The search box filters invoices by invoice number or customer name. Type any part of an invoice number or customer name to instantly narrow the invoice list.
Advanced Filters
Click the filter icon to access advanced filtering options. Status filters by payment state (Paid, Unpaid, Draft, Overdue, Upcoming). Additional filter options help you create precise invoice views for specific analysis needs.
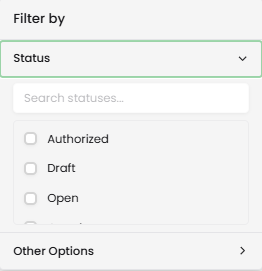
Filters can be combined to create targeted views. For example, filter for overdue invoices from a specific customer, or show unpaid invoices over a certain amount. Click "Clear all filters" at the bottom of the filter panel to reset.
Why it matters: Effective filtering helps you prioritize collections, analyze payment patterns by customer, identify high-value outstanding invoices, or prepare specific reports without scrolling through hundreds of invoices.
Viewing Invoice Details
Click any invoice number to open the detail modal showing complete invoice information.
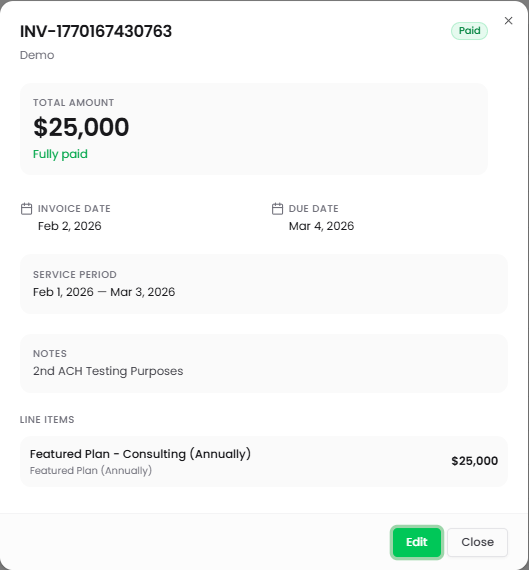
Invoice Header: The modal displays the invoice number at the top with the status badge (Paid, Unpaid, Draft, etc.). Below that shows the customer name and email address if available.
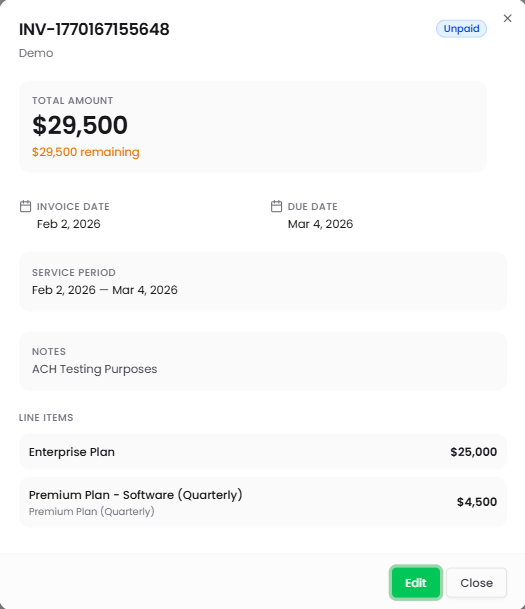
Total Amount: The invoice total displays prominently below the header. For unpaid invoices, an orange text line shows the remaining balance (e.g., "$29,500 remaining"). For paid invoices, green text displays "Fully paid."
Invoice Date and Due Date: These fields show when the invoice was issued and when payment is expected. The dates appear side by side for easy reference.
Service Period: Displays the date range covered by this invoice (e.g., "Feb 2, 2026 — Mar 4, 2026"). This is calculated from the service start and end dates specified during invoice creation and helps customers understand what period they're being billed for.
Notes: Shows any notes or memo text added to the invoice. This freeform text field can include payment terms, special instructions, or other relevant information for the customer.
Line Items: The bottom section lists all products or services included on the invoice with their amounts. Each line item shows the product/service name and its price. Line items may include additional details like billing frequency (e.g., "Premium Plan (Quarterly)").
Why it matters: The detailed view provides complete context for each invoice during customer conversations, payment follow-up, or dispute resolution. Having all information in one place eliminates the need to check multiple systems or documents.
Edit and Close Actions
Click the green Edit button to modify invoice details. This opens the invoice editing form where you can update customer information, dates, line items, or status. Click Close to exit the detail modal without making changes.
For invoices with revenue recognition settings and associated journal entries, editing may be restricted to prevent accounting inconsistencies.
Exporting Invoices
Click the export icon in the toolbar to access export options.
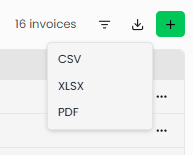
Export Current Page as CSV: Downloads invoices currently visible in your filtered view as a comma-separated values file suitable for spreadsheet analysis.
Export Current Page as XLS: Downloads the same data in Excel format for more advanced spreadsheet features and formatting.
Export as PDF: Generates a comprehensive PDF report including key metrics (Total Outstanding, Overdue Amount, Due This Week, Total Invoices) at the top followed by a table of all invoices with their details. The PDF includes invoice number, customer, amount, status, invoice date, due date, and balance for each invoice.
Individual Invoice Export: When viewing an invoice detail modal, you can export that specific invoice as a standalone PDF document suitable for sending to customers or printing for records.
Why it matters: Exporting enables deeper analysis in spreadsheet tools, supports integration with accounting systems, provides backup copies of invoice data, or creates professional reports for management review. Individual PDF exports give you customer-ready invoices for email distribution.
Creating New Invoices
Click the green "+" button in the top right to open the New invoice modal. The form includes several sections for complete invoice setup.
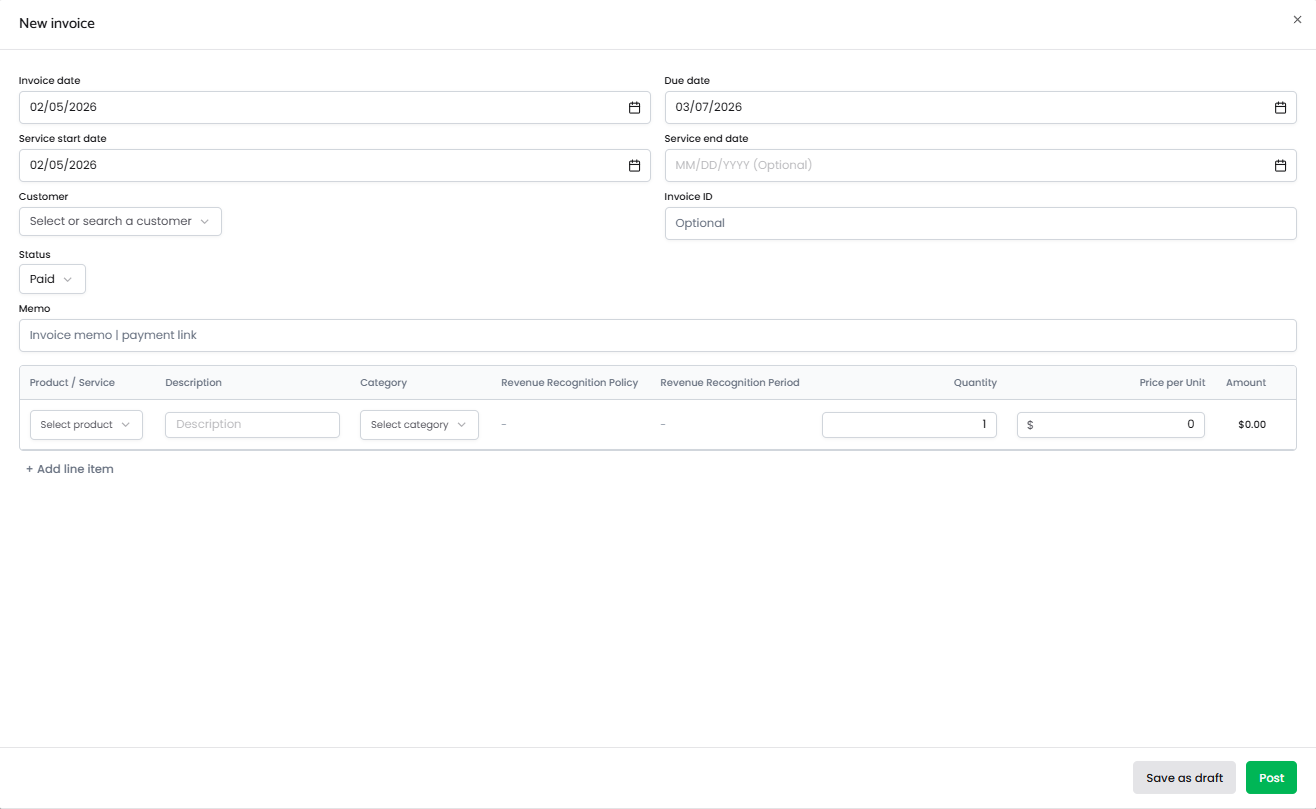
Invoice Dates
Invoice date: Enter the official invoice issue date using the date picker. This determines when payment terms begin and appears on the invoice document.
Due date: Select when payment is expected. The system uses this date to determine when invoices become overdue and calculates payment timing metrics.
Service start date: Enter when the service period begins. This defaults to the invoice creation date if not specified.
Service end date: Optionally enter when the service period ends. This is useful for subscription billing or project-based work where you're invoicing for a specific timeframe.
Customer and Invoice Details
Customer: Select from the "Select or search a customer" dropdown. This pulls from your Customers list. Choosing the customer populates their information on the invoice.
Invoice ID: Optionally enter a custom invoice number. If left blank, the system generates one automatically.
Status: Select the invoice status from the dropdown. Options include Paid (if you're recording an already-paid invoice) and Draft (for invoices you're preparing but not ready to finalize). For new invoices, typically start with Draft and update to Unpaid when finalizing.
Memo: Enter any notes, payment instructions, or special terms in this freeform text field. This information appears in the Notes section of the invoice detail view.
Line Items
The line items section lists all products or services included on the invoice. Each row represents one billable item.
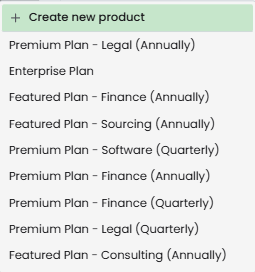
Product / Service: Click "Select product" to choose from your product catalog or type to search. You can also select "+ Create new product" to add new products to your catalog. Products created here persist and appear in future invoice creation.
Description: Add optional details about this line item. This appears below the product name on the invoice.
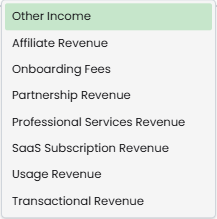
Category: Select the revenue category from the dropdown. Options include revenue classifications like Other Income, Affiliate Revenue, Onboarding Fees, Partnership Revenue, Professional Services Revenue, SaaS Subscription Revenue, Usage Revenue, and Transactional Revenue.
Revenue Recognition Policy: Choose how revenue should be recognized for this line item. Options include Immediate (recognize full amount when invoiced) or Monthly (spread recognition over multiple months).
Revenue Recognition Period: If using Monthly recognition policy, specify the period over which to recognize revenue (e.g., 3 months means the revenue gets recognized evenly over three months).
Quantity: Enter the number of units for this line item. Defaults to 1.
Price per Unit: Enter the unit price. The Amount column calculates automatically by multiplying Quantity × Price per Unit.
Amount: Displays the calculated total for this line item (read-only).
Click + Add line item to add additional products or services to the invoice. Each line item can have its own product, category, and revenue recognition settings.
Why it matters: Detailed line items provide transparency for customers and enable accurate revenue categorization. Revenue recognition settings support proper accrual accounting for subscription and service-based businesses where revenue should be recognized over time rather than all at once.
Saving the Invoice
Click Save as draft to save the invoice without finalizing it. Draft invoices appear in the Draft tab and can be edited freely before sending to customers.
Click Post to finalize the invoice. This typically changes the status to Unpaid and makes the invoice official. Posted invoices appear in the Unpaid tab until payment is received.
Why it matters: Draft status gives you flexibility to prepare invoices in advance, review them with colleagues, or wait for final approval before making them official. Posted invoices create the formal record required for accounts receivable tracking and financial reporting.
Editing Invoices
Click any invoice to open its detail modal, then click the green Edit button to modify invoice details. The editing form matches the creation form with all fields pre-populated.
You can update customer information, dates, line items, status, or notes. Changes save when you click the save button at the bottom of the form.
Editing restrictions: Invoices with revenue recognition settings and associated journal entries may have editing restrictions to prevent accounting inconsistencies. For these invoices, you may need to void the original invoice and create a corrected one rather than editing directly.
Status updates: For manually created invoices, you can change the status manually. For example, mark an invoice as Paid when you receive payment outside of Stripe. For Stripe-imported invoices, status updates automatically based on payment activity in Stripe and cannot be manually changed.
Why it matters: Invoice editing capability allows you to correct errors, update customer information, adjust amounts when terms change, or manually mark invoices as paid when receiving offline payments like checks or wire transfers.
Invoice Status and Payment Flow
Understanding invoice status helps you manage accounts receivable effectively.
Draft: Invoice is saved but not finalized. Customers cannot see or pay draft invoices. Use this status while preparing invoices or waiting for approval before sending to customers.
Unpaid: Invoice has been finalized and issued but payment has not been received. Unpaid invoices appear in accounts receivable and contribute to outstanding balance metrics. These invoices are actively awaiting payment.
Overdue: Unpaid invoices automatically become overdue when the due date passes. Overdue invoices require collection follow-up and indicate potential payment issues that need attention.
Paid: Invoice has been fully paid and contributes to revenue recognition. Paid invoices show $0 balance and move out of accounts receivable.
Authorized: This status appears on some Stripe-imported invoices and relates to payment authorization in Stripe's payment processing workflow.
Manually Created vs. Stripe Invoices: Manually created invoices require manual status updates as you receive payments or track invoice progress. Stripe-imported invoices update automatically based on payment activity in Stripe, providing real-time status without manual intervention.
Why it matters: Accurate invoice status ensures your accounts receivable reports reflect reality, helps you prioritize collection efforts on truly outstanding invoices, and prevents duplicate payment requests or follow-up on already-paid invoices.
Stripe Integration
Invoices created in Stripe automatically import into Futureproof. These invoices appear with the "INV-" prefix followed by a timestamp identifier. Stripe invoices cannot be created directly in Futureproof—they originate in Stripe and sync to Futureproof for consolidated financial visibility.
Stripe invoices include a direct link back to the original invoice in Stripe. This lets you quickly access the full Stripe invoice details, payment information, or customer portal link when needed.
Payment status for Stripe invoices reflects activity in Stripe. When a customer pays a Stripe invoice, the status in Futureproof updates to Paid automatically. This eliminates manual status tracking for Stripe-based billing.
Why it matters: Stripe integration provides unified invoice visibility across both your Stripe subscription billing and any manual invoicing you do directly in Futureproof. You don't need to check two systems to understand your complete accounts receivable position.
Tips for Effective Invoice Management
Monitor overdue invoices weekly: Check the Overdue tab regularly to identify invoices needing collection follow-up. The sooner you follow up on overdue invoices, the more likely you are to collect payment.
Use draft status strategically: Prepare invoices in advance as drafts, then post them on the appropriate billing date. This helps with end-of-month billing where you need to issue many invoices at once.
Leverage date filtering: Use date range presets to focus on relevant periods. Current Month for ongoing AR management, Last Month for month-end close, or custom ranges for quarterly reviews.
Track due this week: Monitor the "Due This Week" metric to anticipate incoming payments and identify invoices that may need gentle reminders as due dates approach.
Keep notes detailed: Use the memo field to document payment terms, special arrangements, project details, or any context that helps you or the customer understand what's being billed.
Export regularly: Create periodic exports for backup purposes or to share AR aging reports with leadership, investors, or your accounting team.
Categorize line items accurately: Proper revenue categorization ensures your Revenue Dashboard accurately reflects revenue composition and helps with financial analysis and tax preparation.
Use individual PDF exports: When following up on unpaid invoices, export the specific invoice as PDF and attach it to your email for professional customer communication.
Common Invoice Scenarios
Recording offline payments: When a customer pays by check, wire transfer, or another method outside Stripe, open the invoice and edit the status to Paid. This keeps your AR accurate without waiting for bank reconciliation.
Subscription billing via Stripe: Stripe automatically generates invoices for subscription charges. These are imported to Futureproof automatically, providing visibility without manual entry.
One-time services or projects: Create manual invoices for consulting work, onboarding fees, or other non-subscription revenue. Use appropriate revenue categories to distinguish this income from recurring subscription revenue.
Quarterly or annual billing: Create invoices with appropriate service periods covering the billing timeframe. Use line items that clearly show the coverage period (e.g., "Q1 2026 Maintenance" or "Annual License 2026-2027").
Multi-item invoices: Add multiple line items when billing for several products or services at once. Each line item can have its own category and revenue recognition settings, supporting complex billing scenarios.
Correcting invoice errors: For draft invoices, edit freely to fix mistakes. For posted invoices without revenue recognition, edit as needed. For invoices with revenue recognition and journal entries, consult your accounting workflow for correction procedures to maintain proper accounting records.